先日、CentOS 8にPi-holeをインストールしたので、今回はDNS Over HTTPSの環境を構築してみます。
手順は下記と同じです。
環境
・CnetOS 8(VM mem:2G, vcpu:1, hdd:32gb)
・CentOS Linux release 8.2.2004 (Core)
・Kernel 4.18.0-193.28.1.el8_2.x86_64
・Minimal Install
・Pi-hole
Pi-hole version is v5.2.1 (Latest: v5.2.1)
AdminLTE version is v5.2.1 (Latest: v5.2.1)
FTL version is v5.3.2 (Latest: v5.3.2)
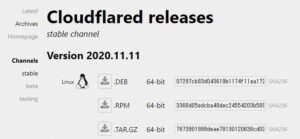
Cloudflared releases Archives
https://dl.equinox.io/cloudflare/cloudflared/stable/archive
Cloudflared releases Archivesからx64の最新のCloudflaredをインストールします。
最新はcloudflared-2020.11.11-linux-amd64.rpmでした。

- cloudflaredインストール
- ユーザcloudflaredの作成
- cloudflaredの構成ファイルの作成
- ユーザcloudflaredにOwner変更
- systemd scriptの作成
- 自動起動の設定と起動
|
1 2 3 4 5 6 7 8 9 10 11 12 13 14 15 16 17 18 19 20 21 22 23 24 25 26 27 28 29 30 31 32 33 |
# dnf -y install https://bin.equinox.io/a/75KvmdrkoVc/cloudflared-2020.11.11-linux-amd64.rpm cloudflared-2020.11.11-linux-amd64.rpm 569 kB/s | 17 MB 00:29 Dependencies resolved. ================================================================================ Package Architecture Version Repository Size ================================================================================ Installing: cloudflared x86_64 2020.11.11-1 @commandline 17 M Transaction Summary ================================================================================ Install 1 Package Total size: 17 M Installed size: 36 M Downloading Packages: Running transaction check Transaction check succeeded. Running transaction test Transaction test succeeded. Running transaction Preparing : 1/1 Installing : cloudflared-2020.11.11-1.x86_64 1/1 Running scriptlet: cloudflared-2020.11.11-1.x86_64 1/1 Verifying : cloudflared-2020.11.11-1.x86_64 1/1 Installed: cloudflared-2020.11.11-1.x86_64 Complete! |
|
1 2 3 4 5 6 7 8 |
# rpm -ql cloudflared-2020.11.11-1 /usr/lib/.build-id /usr/lib/.build-id/34 /usr/lib/.build-id/34/6e5bcbb0f772b1aa7b7aebf5cf802e5b05fdbf /usr/local/bin/cloudflared # cloudflared -v cloudflared version 2020.11.11 (built 2020-11-25-1643 UTC) |
デーモンを実行するためのユーザcloudflaredを作成します。
|
1 |
# useradd -s /usr/sbin/nologin -r -M cloudflared |
cloudflaredをポート5053で動作させ、cloudflareのDNS 1.1.1.1と1.0.0.1を指定しています。
|
1 2 3 4 5 |
# vi /etc/default/cloudflared # cat /etc/default/cloudflared # Commandline args for cloudflared, using Cloudflare DNS CLOUDFLARED_OPTS=--port 5053 --upstream https://1.1.1.1/dns-query --upstream https://1.0.0.1/dns-query |
/etc/default/cloudflared, /usr/local/bin/cloudflared のOwner変更します。
|
1 2 |
# sudo chown cloudflared:cloudflared /etc/default/cloudflared # sudo chown cloudflared:cloudflared /usr/local/bin/cloudflared |
|
1 2 3 4 5 6 7 8 9 10 11 12 13 14 15 16 17 18 |
# sudo vi /etc/systemd/system/cloudflared.service # cat /etc/systemd/system/cloudflared.service [Unit] Description=cloudflared DNS over HTTPS proxy After=syslog.target network-online.target [Service] Type=simple User=cloudflared EnvironmentFile=/etc/default/cloudflared ExecStart=/usr/local/bin/cloudflared proxy-dns $CLOUDFLARED_OPTS Restart=on-failure RestartSec=10 KillMode=process [Install] WantedBy=multi-user.target |
|
1 2 3 4 5 6 7 8 9 10 11 12 13 14 15 16 17 18 |
# systemctl enable cloudflared Created symlink /etc/systemd/system/multi-user.target.wants/cloudflared.service -> /etc/systemd/system/cloudflared.service. # systemctl start cloudflared # systemctl status cloudflared * cloudflared.service - cloudflared DNS over HTTPS proxy Loaded: loaded (/etc/systemd/system/cloudflared.service; enabled; vendor pre> Active: active (running) since Sat 2020-12-05 12:49:56 JST; 6s ago Main PID: 1693 (cloudflared) Tasks: 6 (limit: 12513) Memory: 14.6M CGroup: /system.slice/cloudflared.service `-1693 /usr/local/bin/cloudflared proxy-dns --port 5053 --upstream h> Dec 05 12:49:56 pi-hole.rootlinks.net systemd[1]: Started cloudflared DNS over > Dec 05 12:49:56 pi-hole.rootlinks.net cloudflared[1693]: INFO[2020-12-05T12:49:> Dec 05 12:49:56 pi-hole.rootlinks.net cloudflared[1693]: INFO[2020-12-05T12:49:> Dec 05 12:49:56 pi-hole.rootlinks.net cloudflared[1693]: INFO[2020-12-05T12:49:> Dec 05 12:49:56 pi-hole.rootlinks.net cloudflared[1693]: INFO[2020-12-05T12:49:> |
この後はdigコマンドで確認してPi-holeにログイン、DNS設定を127.0.0.1#5053とすれば完了です。
help
|
1 2 3 4 5 6 7 8 9 10 11 12 13 14 15 16 17 18 19 20 21 22 23 24 25 26 27 28 29 30 31 32 33 34 35 36 |
# cloudflared -h NAME: cloudflared - Cloudflare's command-line tool and agent USAGE: cloudflared [global options] [command] [command options] VERSION: 2020.11.11 (built 2020-11-25-1643 UTC) DESCRIPTION: cloudflared connects your machine or user identity to Cloudflare's global network. You can use it to authenticate a session to reach an API behind Access, route web traffic to this machine, and configure access control. COMMANDS: update Update the agent if a new version exists version Print the version proxy-dns Run a DNS over HTTPS proxy server. service Manages the Argo Tunnel system service help, h Shows a list of commands or help for one command Access: access, forward access <subcommand> Tunnel: tunnel Make a locally-running web service accessible over the internet using Argo Tunnel. GLOBAL OPTIONS: --name value, -n value Stable name to identify the tunnel. Using this flag will create, route and run a tunnel. For production usage, execute each command separately [$TUNNEL_NAME] --help, -h show help (default: false) --version, -v, -V Print the version (default: false) COPYRIGHT: (c) 2020 Cloudflare Inc. Your installation of cloudflared software constitutes a symbol of your signature indicating that you accept the terms of the Cloudflare License (https://developers.cloudflare.com/argo-tunnel/license/), Terms (https://www.cloudflare.com/terms/) and Privacy Policy (https://www.cloudflare.com/privacypolicy/). |