老眼SEは時間を見つけてはコツコツとCentOS 6.5から大幅に変更になっているCentOS 7と格闘しています。
今回は試しに有償ウィルス対策ソフトのLinux版 ServerProtect 3.0をインストールしてみました。
ただ、購入していないのでアクティベーションができず最終動作確認までは出来ていません。
ServerProtect™ for Linux
http://www.trendmicro.co.jp/jp/business/products/splx/index.html
最新ダウンロード ServerProtect for Linux 3.0
http://downloadcenter.trendmicro.com/index.php?regs=jp&clk=latest&clkval=3388&lang_loc=13
6/23日現在、RedHat 7用のSPLX3_RHEL7.tgz(リリース日付:2015-01-29)のみで、CentOS 7用はありません。
取り敢えずこのSPLX3_RHEL7.tgz(リリース日付:2015-01-29)をCentOS 7にインストールしてみます。
インストール環境
・CentOS Linux release 7.1.1503 (Core)
・Kernel 3.10.0-229.4.2.el7.x86_64
・最小構成 + 開発ツールインストール
- 事前準備
- ServerProtectダウンロード
- SPLX3_RHEL7.tgz解凍
- md5 checksum
- 実行権限付加
- SProtectLinux-3.0.binインストール
- KHMのインストール
- KHMの解凍
- KHMの設置
- 自動起動の確認
- ServerProtect再起動
- Firewallの許可
- 管理画面へアクセス
ServerProtectインストールの前に必要なモジュールをインストールします。
Readmeには下記のモジュールが必要との記載があります。
Trend Micro ServerProtect for Linux 3.0 Readme
http://www.trendmicro.com/ftp/jp/ucmodule/splx/30/Document2/SPLX30_ReadMe_RHEL7_r1_utf8.txt
|
1 2 3 4 5 6 7 8 9 10 11 12 13 |
注意: LinuxコンピュータにServerProtectをインストールする前に、次の依存パッ ケージがインストールされていることを確認します (パッケージのバージョン は今後のRed Hat Enterprise Linux 7リリースで変更される可能性が あります)。 - glibc-2.17-55.el7.x86_64 - zlib-1.2.7-13.el7.x86_64 - compat-libstdc++-33-3.2.3-71.el7.x86_64 - libuuid-2.23.2-16.el7.x86_64 - nss-softokn-freebl-3.15.4-2.el7.x86_64 - libgcc-4.8.2-16.el7.x86_64 - perl-Sys-Syslog-0.33-3.el7.x86_64 - bzip2-1.0.6-12.el7.x86_64 |
やっとネイティブ64bitプログラムになったようです。
何から何まで考慮してくれるyumを利用してインストールします。
|
1 2 3 4 5 6 7 8 9 10 |
[root@host01 ~]# yum -y install glibc zlib compat-libstdc++-33 libuuid nss-softokn-freebl libgcc perl-Sys-Syslog bzip2 読み込んだプラグイン:fastestmirror base | 3.6 kB 00:00 extras | 3.4 kB 00:00 updates | 3.4 kB 00:00 Loading mirror speeds from cached hostfile * base: www.ftp.ne.jp * extras: www.ftp.ne.jp * updates: www.ftp.ne.jp (snip) |
|
1 2 3 4 5 6 7 8 9 10 11 12 13 |
[root@host01 ~]# wget http://files.trendmicro.com/products/splx/SPLX3_RHEL7.tgz --2015-06-23 08:51:33-- http://files.trendmicro.com/products/splx/SPLX3_RHEL7.tgz files.trendmicro.com (files.trendmicro.com) をDNSに問いあわせています... 116.91.142.89, 116.91.142.73 files.trendmicro.com (files.trendmicro.com)|116.91.142.89|:80 に接続しています... 接続しました。 HTTP による接続要求を送信しました、応答を待っています... 200 OK 長さ: 82898577 (79M) [text/plain] `SPLX3_RHEL7.tgz' に保存中 100%[======================================>] 82,898,577 2.52MB/s 時間 35s 2015-06-23 08:52:08 (2.27 MB/s) - `SPLX3_RHEL7.tgz' へ保存完了 [82898577/82898577] [root@host01 ~]# ls -l -rw-r--r--. 1 root root 82898577 11月 17 2014 SPLX3_RHEL7.tgz |
|
1 2 3 4 5 6 7 8 |
[root@host01 ~]# tar xvfz SPLX3_RHEL7.tgz SProtectLinux-3.0.bin md5sum [root@host01 ~]# ls -l 合計 162004 -rw-r--r--. 1 root root 82898577 11月 17 2014 SPLX3_RHEL7.tgz -rw-r--r--. 1 root root 82982065 10月 28 2014 SProtectLinux-3.0.bin -rw-r--r--. 1 root root 56 10月 28 2014 md5sum |
md5 checksumファイルが添付されていたので、たまにはこんなことも(^^
|
1 2 3 4 |
[root@host01 ~]# md5sum SProtectLinux-3.0.bin >> md5sum [root@host01 ~]# md5sum -c md5sum SProtectLinux-3.0.bin: 完了 SProtectLinux-3.0.bin: 完了 |
改ざんされていません。
インストールプログラムのSProtectLinux-3.0.binに実行権限を付加します。
|
1 2 3 4 5 |
[root@host01 ~]# chmod u+x SProtectLinux-3.0.bin [root@host01 ~]# ls -l -rw-r--r--. 1 root root 82898577 11月 17 2014 SPLX3_RHEL7.tgz -rwxr--r--. 1 root root 82982065 10月 28 2014 SProtectLinux-3.0.bin -rw-r--r--. 1 root root 112 6月 23 09:05 md5sum |
|
1 2 3 4 5 6 7 8 9 10 11 12 13 14 15 16 17 18 19 20 21 22 23 24 25 26 27 28 29 30 31 32 33 34 35 36 37 38 39 40 41 42 43 44 45 46 47 48 49 50 51 52 |
[root@host01 ~]# ./SProtectLinux-3.0.bin NOTICE: Trend Micro licenses its products in accordance with certain terms and conditions. By breaking the seal on the CD jacket in the Software package or installing a serial number, registration key or activation code, You already #(ライセンス契約書が延々と表示されます) SPLX version 3.0 Released June 29, 2007 Do you agree to the above license terms? (yes or no) yes Installing ServerProtect for Linux: Unpacking... Installing rpm file... 準備しています... ################################# [100%] 更新中 / インストール中... 1:SProtectLinux-3.0-1029 ################################# [100%] Do you wish to connect this SPLX server to Trend Micro Control Manager? (y/n) [y] n Activate ServerProtect to continue scanning and security updates. Activation is a two-step process that you can complete during or after installation. Step 1. Register Use the Registration Key that came with your product to register online (https://olr.trendmicro.com/redirect/product_register.aspx). (Please skip this step if the product is already registered.) Step 2. Activate Type the Activation Code received after registration to activate ServerProtect. (Press [Ctrl+D] to abort activation.) #(アクティベーションコードが無いので[Ctrl+D]でスキップします) Activation Code: Starting services... Starting ServerProtect for Linux: Checking configuration file: [ OK ] Starting splxcore: Starting Entity: [ OK ] Loading splx kernel module: [FAILED] Starting vsapiapp: [FAILED] ServerProtect for Linux core started. [ OK ] Starting splxhttpd: Starting splxhttpd: [ OK ] ServerProtect for Linux httpd started. [ OK ] ServerProtect for Linux started. ServerProtect has not been activated. You must activate your product to enable scanning and security updates. The virus notification program is not started. This program only starts in K Desktop Environment (KDE). Start this program using the Quick Access console in KDE. ServerProtect for Linux installation completed. |
取り敢えずインストールは出来たようです。
リアルタイムスキャンを有効にするためにはKernelに対応したカーネルフックモジュール(KHM)をインストールする必要があります。
ServerProtect for Linux 3 – Kernel Support
http://downloadcenter.trendmicro.com/index.php?clk=tbl&clkval=111®s=NABU&lang_loc=1#fragment-111
今回はRed Hat Enterprise Linux 7.0用3.10.0-229.4.2.el7.x86-64(splx_kernel_module-3.0.1.0013.rhel7_3.10.0-229.4.2.el7.x86_64.x86_64.tar.gz)を使用します。
|
1 2 3 4 5 6 7 8 9 10 11 12 13 14 15 16 17 18 19 |
[root@host01 ~]# uname -a Linux host01.rootlinks.net 3.10.0-229.4.2.el7.x86_64 #1 SMP Wed May 13 10:06:09 UTC 2015 x86_64 x86_64 x86_64 GNU/Linux [root@host01 ~]# wget http://files.trendmicro.com/products/kernel/splx_kernel_module-3.0.1.0013.rhel7_3.10.0-229.4.2.el7.x86_64.x86_64.tar.gz --2015-06-23 09:25:49-- http://files.trendmicro.com/products/kernel/splx_kernel_module-3.0.1.0013.rhel7_3.10.0-229.4.2.el7.x86_64.x86_64.tar.gz files.trendmicro.com (files.trendmicro.com) をDNSに問いあわせています... 116.91.142.89, 116.91.142.73 files.trendmicro.com (files.trendmicro.com)|116.91.142.89|:80 に接続しています... 接続しました。 HTTP による接続要求を送信しました、応答を待っています... 200 OK 長さ: 460332 (450K) [application/x-gzip] `splx_kernel_module-3.0.1.0013.rhel7_3.10.0-229.4.2.el7.x86_64.x86_64.tar.gz' に保存中 100%[======================================>] 460,332 2.55MB/s 時間 0.2s 2015-06-23 09:25:50 (2.55 MB/s) - `splx_kernel_module-3.0.1.0013.rhel7_3.10.0-229.4.2.el7.x86_64.x86_64.tar.gz' へ保存完了 [460332/460332] [root@host01 ~]# ls -l -rw-r--r--. 1 root root 82898577 11月 17 2014 SPLX3_RHEL7.tgz -rwxr--r--. 1 root root 82982065 10月 28 2014 SProtectLinux-3.0.bin -rw-r--r--. 1 root root 112 6月 23 09:05 md5sum -rw-r--r--. 1 root root 460332 5月 28 12:43 splx_kernel_module-3.0.1.0013.rhel7_3.10.0-229.4.2.el7.x86_64.x86_64.tar.gz |
|
1 2 3 4 5 6 7 8 9 |
[root@host01 ~]# tar xvfz splx_kernel_module-3.0.1.0013.rhel7_3.10.0-229.4.2.el7 .x86_64.x86_64.tar.gz splxmod-3.10.0-229.4.2.el7.x86_64.x86_64.o splxmod-3.10.0-229.4.2.el7.x86_64.x86_64.o.md5 [root@host01 ~]# md5sum splxmod-3.10.0-229.4.2.el7.x86_64.x86_64.o > md5.txt [root@host01 ~]# cat splxmod-3.10.0-229.4.2.el7.x86_64.x86_64.o.md5 >> md5.txt [root@host01 ~]# md5sum -c md5.txt splxmod-3.10.0-229.4.2.el7.x86_64.x86_64.o: 完了 splxmod-3.10.0-229.4.2.el7.x86_64.x86_64.o: 完了 |
splxmod-3.10.0-229.4.2.el7.x86_64.x86_64.oを所定の場所に移動します。
|
1 2 3 4 5 6 |
[root@host01 ~]# mv splxmod-3.10.0-229.4.2.el7.x86_64.x86_64.o /opt/TrendMicro/SProtectLinux/SPLX.module/ [root@host01 ~]# ls -l /opt/TrendMicro/SProtectLinux/SPLX.module/ 合計 6860 -rw-r--r--. 1 root root 1765705 5月 27 17:48 splxmod-3.10.0-229.4.2.el7.x86_64.x86_64.o -r--------. 1 root root 5254605 10月 28 2014 splxmod.tgz drw-r--r--. 4 root root 32 6月 23 09:13 src |
systemctlでは無く従来の起動方法になります。
|
1 2 3 4 5 6 7 8 9 10 11 12 13 14 15 16 17 18 19 |
[root@host01 ~]# ls -l /etc/init.d/ -rw-r--r--. 1 root root 1160 5月 13 04:44 README -rw-r--r--. 1 root root 13430 1月 15 17:57 functions -rwxr-xr-x. 1 root root 2989 1月 15 17:57 netconsole -rwxr-xr-x. 1 root root 6470 1月 15 17:57 network -r-x------. 1 root root 17331 10月 28 2014 splx -r-x------. 1 root root 28386 10月 28 2014 splxcore -r-x------. 1 root root 13966 10月 28 2014 splxhttpd [root@host01 ~]# chkconfig --list 注記: この出力は SysV サービスのみであり、ネイティブな systemd のサービスは含ま れていません。 systemd services. SysV 設定のデータはネイティブな systemd の設定によって上書きされます。 systemd サービスを一覧表示するには 'systemctl list-unit-files' を使用して ください。 特定のターゲットにおいて有効化されているサービスを確認するには、 'systemctl list-dependencies [target]' 。 netconsole 0:off 1:off 2:off 3:off 4:off 5:off 6:off network 0:off 1:off 2:on 3:on 4:on 5:on 6:off splx 0:off 1:off 2:off 3:on 4:on 5:on 6:off |
|
1 2 3 4 5 6 7 8 9 10 11 12 13 14 15 16 17 18 19 20 21 22 23 24 25 26 27 28 29 30 31 32 33 34 35 36 37 38 39 40 |
[root@host01 ~]# /etc/init.d/splx restart Shutting down ServerProtect for Linux: Shutting down splxcore: Shutting down vsapiapp [FAILED] Unloading splx kernel module: [FAILED] Shutting down entity: [ OK ] ServerProtect for Linux core stopped normally. [ OK ] Shutting down splxhttpd: Shutting down splxhttpd: [ OK ] ServerProtect for Linux httpd stopped normally. [ OK ] ServerProtect for Linux stopped normally. Starting ServerProtect for Linux: Checking configuration file: [ OK ] Starting splxcore: Starting Entity: [ OK ] Loading splx kernel module: [FAILED] Starting vsapiapp: [FAILED] ServerProtect for Linux core started. [ OK ] Starting splxhttpd: Starting splxhttpd: [ OK ] ServerProtect for Linux httpd started. [ OK ] ServerProtect for Linux started. ServerProtect has not been activated. You must activate your product to enable scanning and security updates. [root@host01 ~]# /etc/init.d/splx status splxmod module is stopped vsapiapp is stopped entity (pid 24429 24420) is running... ServerProtect for Linux core is stopped splxhttpd (pid 24497 24496 24495 24494 24493 24467) is running... ServerProtect for Linux httpd is running... ServerProtect for Linux manual scan is stopped ServerProtect for Linux scheduled scan is stopped ServerProtect for Linux Control Manager agent is not registered to Trend Micro Control Manager server |
アクティベーションを行えばこのエラーは無くなると思われます(^^;
ServerProtectのhttpポートはhttp(14942),https(14943)です。
Firewallが有効の場合はこのポートを許可して下さい。
ServerProtect for Linuxが使用するポート
http://esupport.trendmicro.com/solution/ja-jp/1306372.aspx?cm_re=Sup-_-sp-_-l_setting_function_3
|
1 2 3 4 |
[root@host01 ~]# firewall-cmd --permanent --add-port=14942-14943/tcp success [root@host01 ~]# firewall-cmd --reload success |
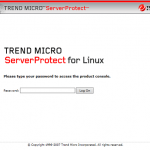
ServerProtect管理画面へアクセスしてログインします。
http://ServerProtect_ip:14942/
https://ServerProtect_ip:14943/
(httpsはローカル証明書なのでブラウザで警告が表示されます)
パスワード:無し
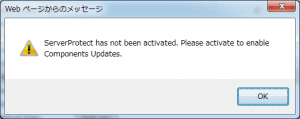
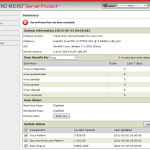
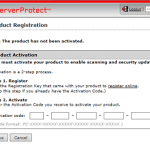
アクティベーションが完了していないとウィルスパターンのアップデートもできません。
ServerProtect for Windowsのように30日間ぐらいフル機能が使用できればいいのですが…


